How to Create Custom Arrowheads in Illustrator
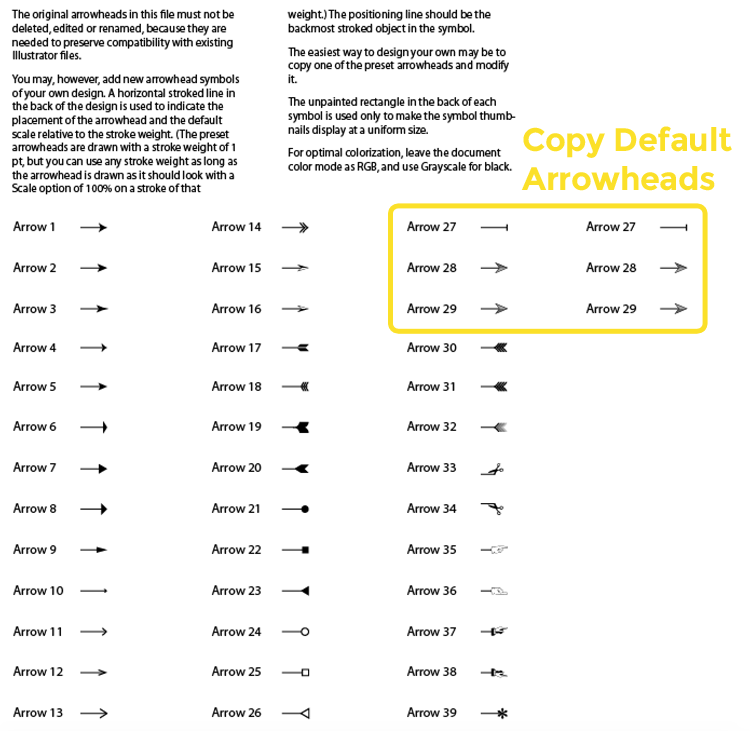
Have you ever felt limited by the default arrowhead options available in Adobe Illustrator? There are 39 different arrows to pick from and about 36 of them are total garbage. So, if you're like me, you usually end up creating your own custom shapes in Illustrator.
But what if you're working on a really big project or an info graphic with tons of strokes and arrows all over the place? It can be difficult and time-consuming to try to recreate the same, consistent arrowhead over and over at different angles and scales. And what if you need to make a change to that arrowhead some time down the road? Making each change manually is super-inefficient and leaves a ton of room for error. Yuck.
Well friends, I'm here to tell you that there is a better way. You can create your own custom arrowheads for Illustrator and add them to the stroke palette. And it's pretty simple once you know where to look.
First, navigate to your Adobe Illustrator folder [Applications>Your Version of Adobe Illustrator]. Then Right-Click on the application itself. Select Show Package Contents from the dropdown menu.
Click on Required>Resources>en_US and Open the file named "Arrowheads.ai
DO NOT SAVE OVER THIS FILE
Go to File>Save As and save a copy in the main Illustrator plugins folder.
Press Shift+O to access your Artboard tool and drag some extra workspace out to the side. Then copy over one or more of the original arrowhead symbols. Make one copy for each custom arrowhead you want to create; I will be making three new arrowheads.
Right click on each duplicated arrowhead object and click Break Link to Symbol in the dropdown menu.
Now that they are unlinked, you can edit these copies to your heart's content. I would read over the directions that are included in the arrowheads.ai file even though they are kind of unclear. You mainly need to understand that the size of the arrowhead will be proportional to the stroke weight in this file and the arrowhead should be designed on the right end of the path. You can always come back to this file and tweak things later if they're not quite how you want them.
To give you a few ideas, here's what I came up with.
I recommend that you maintain the organization of the file and give your arrowheads simple, descriptive names to make things easier on yourself in the future.
Now draw a marquee to select one new arrowhead, it's path and the box behind it. Drag this selection into your symbols palette. For reference, this is what the symbols palette looks like:
Type in the name of your arrowhead. Leaving the symbol type as "Movie Clip" is fine. Repeat these steps for each custom arrowhead. Now when you click on your arrowheads, you'll notice that the selection looks a little different. This is because they've been converted to symbols.
Save the file (the copy that you made in the "Plugins" folder) and restart Illustrator.
Open a new file and draw a few paths to test out your new arrowheads.
Open the Stroke palette. Click on the Arrowheads dropdown and select your new arrowhead from the menu.
Viola! Notice that the arrowhead scales proportionally to the weight of the stroke, so you can use them at any size.
Follow me on twitter to continue the conversation:


